Punaro Glen Construction: Mid-December
You know what’s great about getting early snow when you’re building a house on top of a hill in ski country? Nothing. Progress slowed down considerably since last update, although there were still some key accomplishments.
#1 – Windows all got installed:
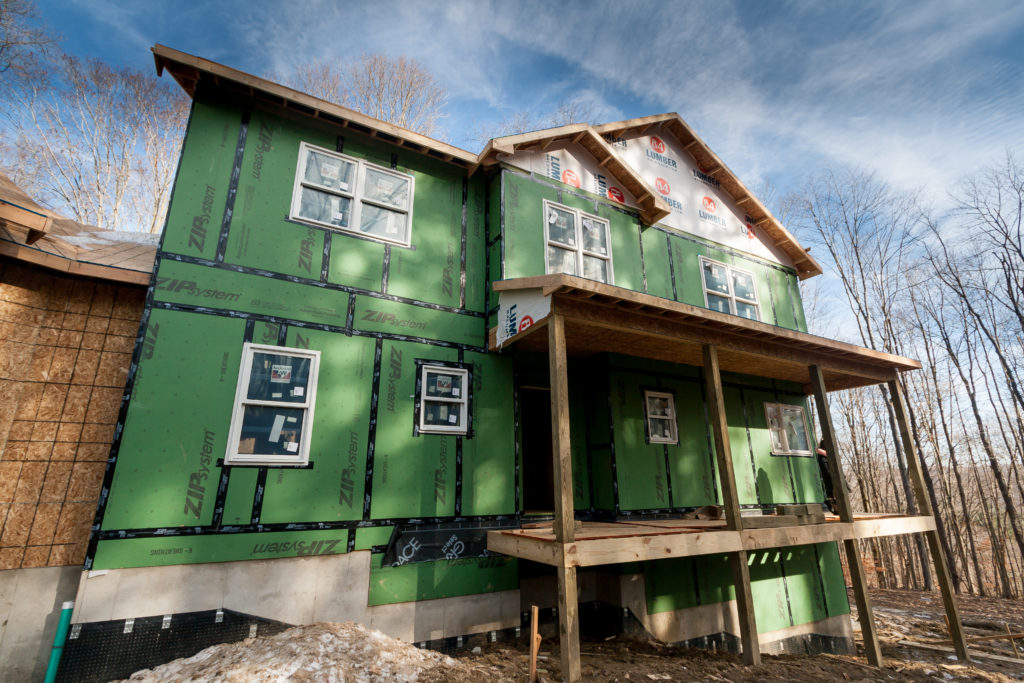
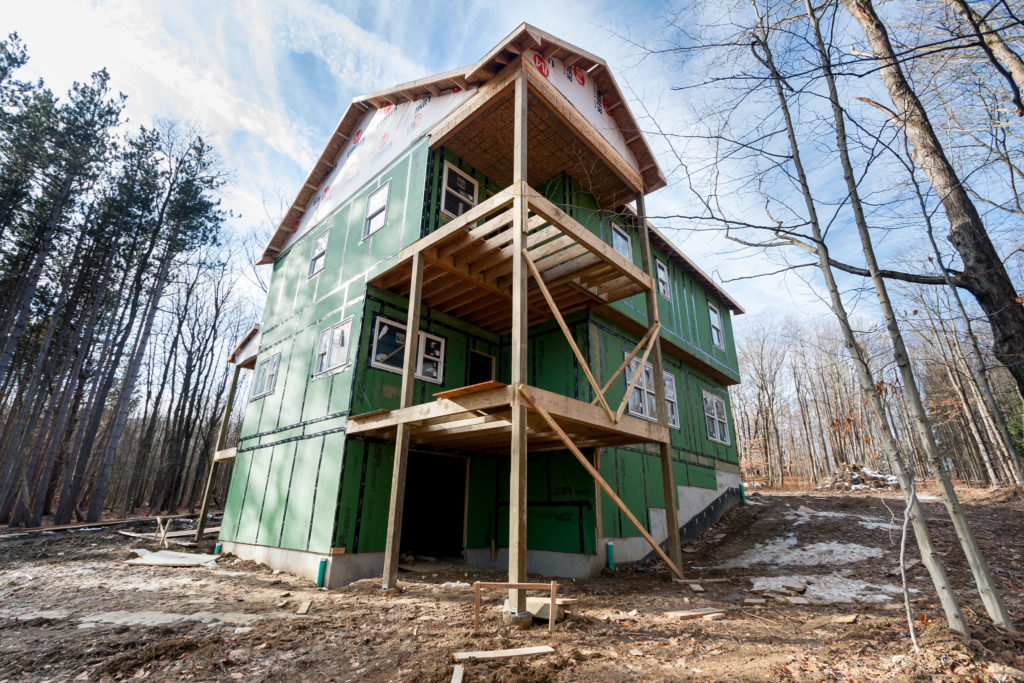
#2 – Roofing all got installed. We were told that they couldn’t get the crane truck up the hill with the snow, so they shuttled up a pallet of shingles at a time and then lifted each bundle to the roof by hand.
#3 – Doors – Our front door was installed and temporary doors were installed elsewhere so they don’t get beat up during construction. The garage will also get temporary boarding up soon.
Between these three things, the interior of the house was able to mostly dry out. One oopsie – the roofers didn’t put any sort of cap on the chimney so rain was able to come down that and leak into the upstairs. We reported that back to the builder and they sent the roofers to put a temporary cap on the chimney. The permanent cap will be installed by Countryside Stove & Chimney, where we are getting our fireplace from.
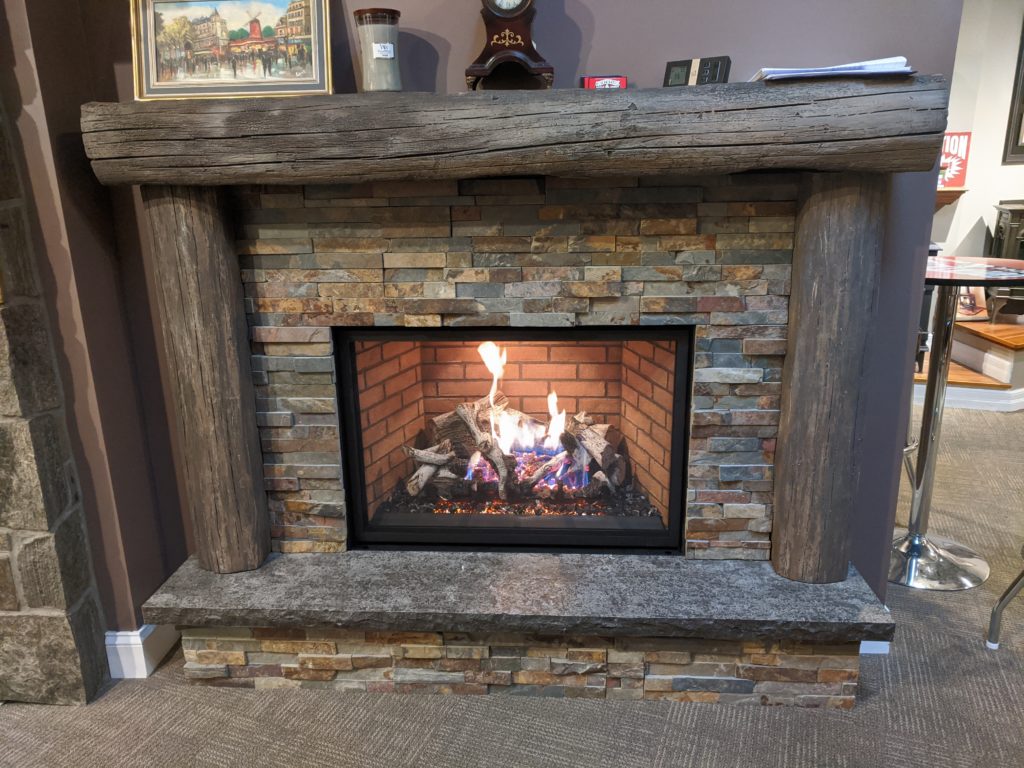
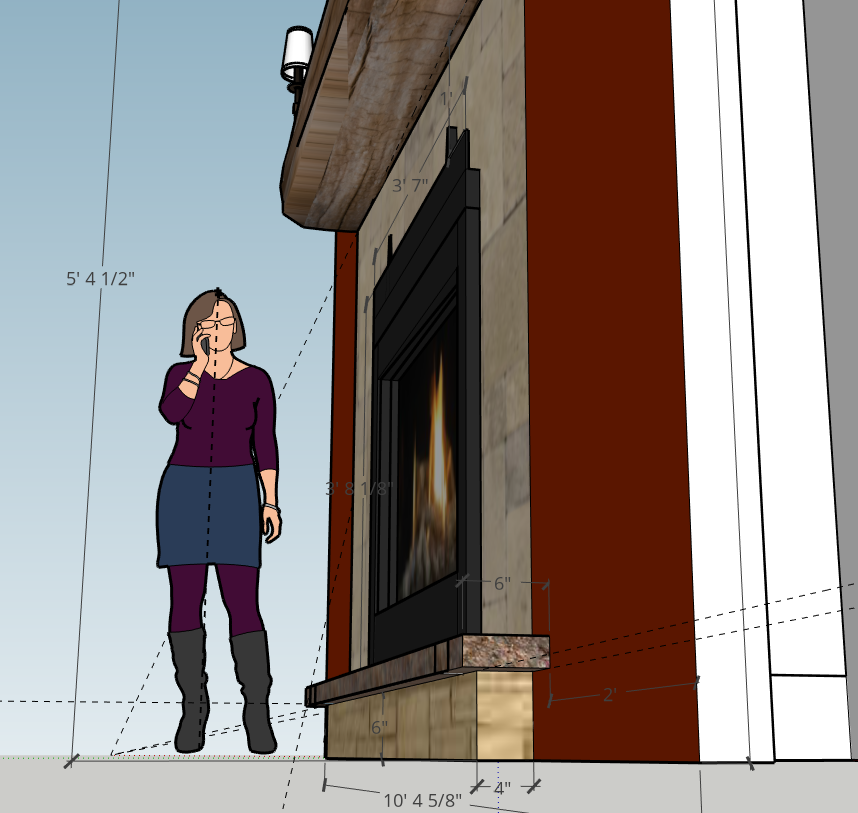
That was also another major decision made – we decided on a fireplace. We designed that room so that the fireplace was given a prominent location, more so than the TV which is on a side wall. Our original thought was to go with the absolutely massive Fireplace Xtrodinair 4237, mostly because we loved the vertically stacked bonfire log set. There were two issues with that fireplace though – first, the price ticked in at over $10,000 which was really just too high for our budget. Second, that fireplace puts out 60,000 btu – enough to heat 3000 sq ft, which is bigger than our entire house. We worried that we’d never get to enjoy the magnificent flames for more than 10 minutes before we’d have to shut it off or bake everyone in the house (cats probably would have loved it though). We opted for the smaller 864 40K Deluxe instead, which has a lot of great features (two stage burner, interior lighting, etc.) that make it one of the most realistic gas fireplaces we’ve ever seen. Despite this fireplace being an upgrade over the allowance we have in our budget, it’s a significant cost savings over having a wood burning fireplace with a masonry chimney.
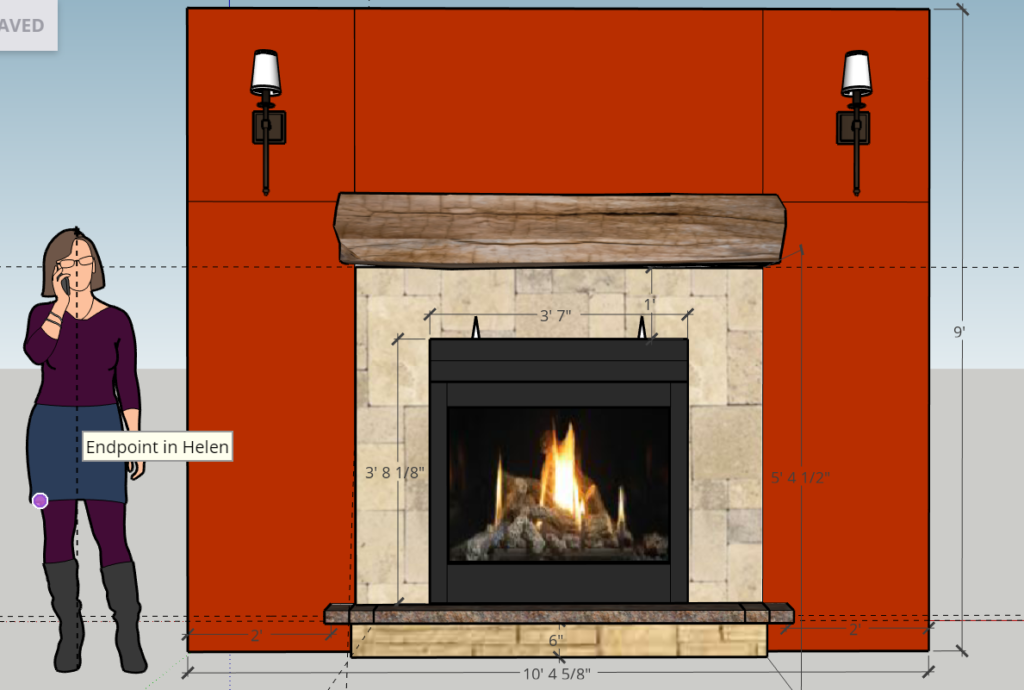
We also needed to plan exactly how we wanted to “lay out” the fireplace wall – where to position the fireplace, hearth, mantle, stone surround. The builder needs to know all that so they properly frame for the fireplace and the installer only has to come in, slide it in place, and hook it all up. I took to Sketchup for this task. Having pretty much no CAD or 3D modelling skills, this was a bit of a challenge for me, but with the help of a couple tutorial videos, I was able to mock it up well enough to give the builder what they need to do their job.
We also had our first post-framing walkthrough with the builder. Prior to that, NY Kitchen & Bath came out and drew the cabinet layout on the floor.
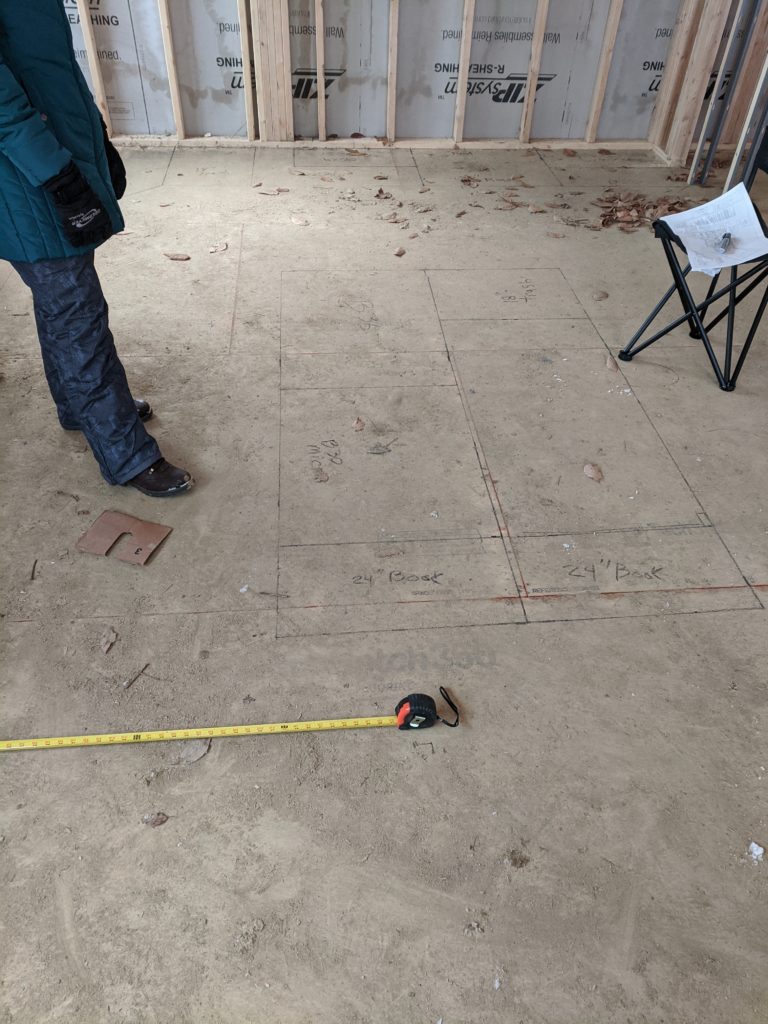
This was a really useful step in the process, since up to this point you’re trying your best to fit things in based on blueprint layouts and measuring spaces in their showroom and other houses to get an idea for how everything is sized. Once you see it on your own floor, it’s much easier to tell what works and what doesn’t. We had two issues that needed to be addressed. First, over a few iterations we made our kitchen island bigger and bigger until it really became too big for the room and was encroaching on where our dining nook table will be. We ended up getting rid of the two “bookcase” cabinets on the end of the island in the picture above so you could more easily maneuver through the kitchen.
The second issue was really a framing problem with our 2nd floor laundry room. There were revisions made to the size and layout of the laundry room that required repositioning a door from the original floorplan. When it got framed, the room got sized correctly but the door never got moved, making putting the cabinets we wanted in there impossible. Custom Builders of WNY spent some time discussing options with us, and Amanda and I spent a couple days thinking through them and working through some revisions with NYK&B. Ultimately, we settled on a combination of moving one door, reframing one wall, and editing our cabinet design to eliminate a sink in the laundry room but give us more countertop space. While it was a bit of a construction screwup, the good thing was our builder left all options on the table, it was just a matter of us deciding what we thought would work best. The cabinet edit in the laundry room also let us downgrade to a stock cabinet line that will save us a few hundred dollars. Not enough to offset the increase for the fireplace, but any amount helps.
I started to write about lighting and home automation and before I knew it I was up to 4 paragraphs, so I’ll save that for a future post. We plan on checking in with the builder next week to talk through the next phase of construction. Hoping to get some plumbing and HVAC started, and trenching for utilities soon!